Setting Up C++ & Arduino IDE
Welcome back, robot builders! In our last post, we talked about
why C++ is the powerhouse behind so many amazing robots. Today, we're
going to put that theory into practice. Before we can make our robot do
anything, we need to set up our "workbench", the tools that allow us to write
C++ code and load it onto our robot's brain.
For this blog, our primary training ground will be the Arduino platform. It's incredibly user-friendly, affordable, and, most importantly, it uses C++ as its core programming language. This makes it perfect for learning how C++ interacts directly with hardware.
Let's get started!
Step 1: Downloading and Installing the Arduino IDE
The Arduino IDE (Integrated Development Environment) is where you'll write your C++ code (which Arduino calls "sketches"), compile it, and upload it to your Arduino board.
-
Go to the Official Website: Open your web browser and navigate to
arduino.cc/software -
Choose Your Operating System: You'll see options for Windows, macOS, and Linux. Select the installer appropriate for your computer.
-
Download: You can choose to contribute to Arduino's development or just click "JUST DOWNLOAD."
-
Install: Once downloaded, run the installer. Follow the on-screen prompts. It's usually a straightforward process of clicking "Next" and "Install."
- Visual Aid: Include a screenshot of the Arduino software download page, highlighting the download options.
- Visual Aid: Include a screenshot of the Arduino IDE installer window (e.g., the "I Agree" or "Installation Options" screen).
Step 2: Getting Familiar with the Arduino IDE
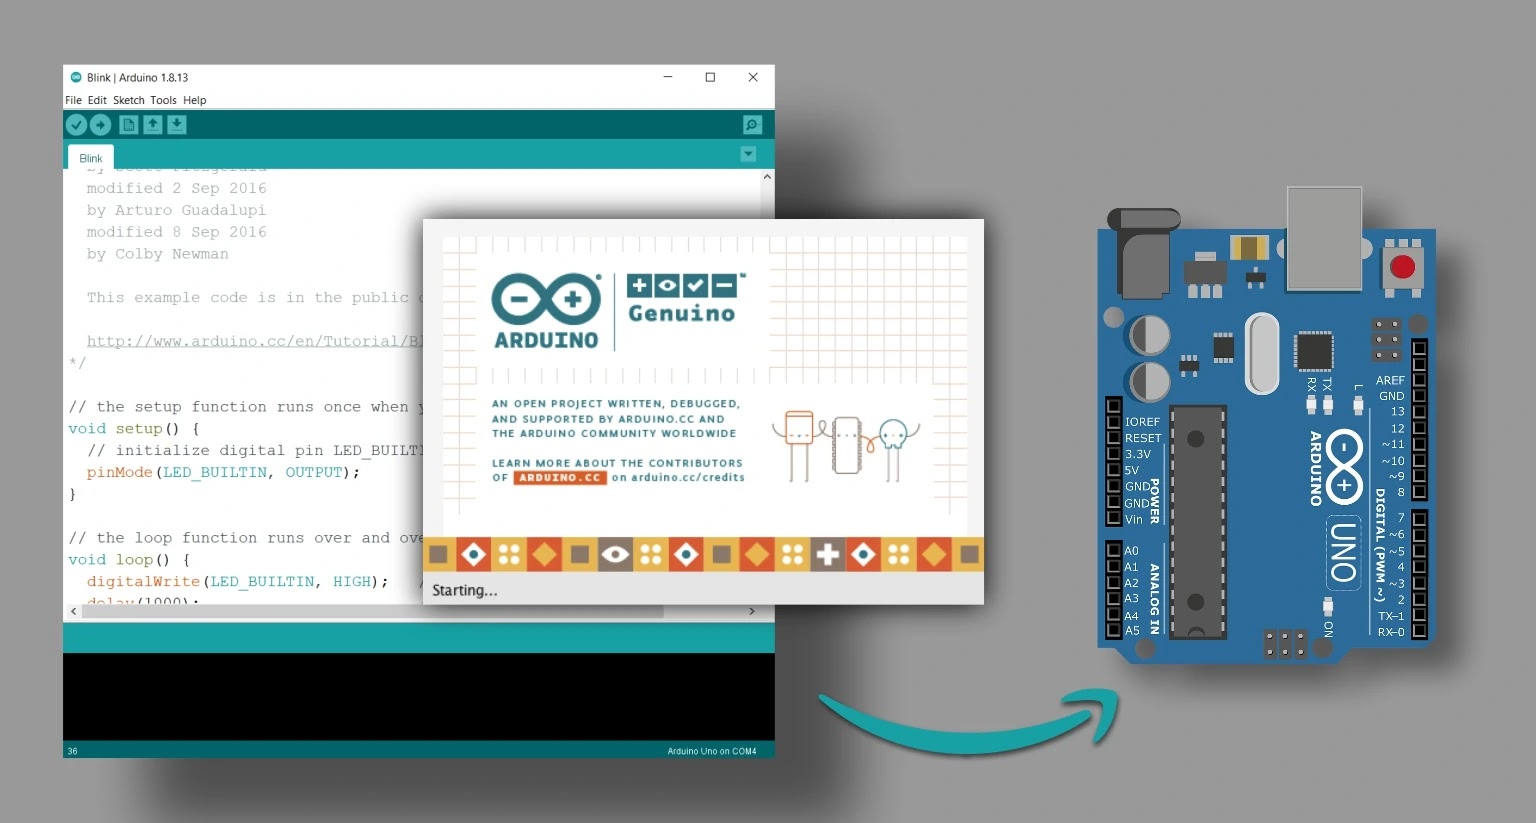
Once installed, open the Arduino IDE. You'll see a window that looks something like this:
- Visual Aid: Insert a screenshot of the empty Arduino IDE, possibly with arrows pointing to key areas.
Let's quickly identify the main parts:
- Toolbar: Icons for Verify (check code for errors), Upload (send code to Arduino), New, Open, Save.
- Sketch Editor: This is the large white area where you write your C++ code.
- Output Console: The black area at the bottom. This is where you'll see messages from the IDE (like compilation errors or successful uploads).
- Serial Monitor Icon: (Top right, magnifying glass icon) Crucial for debugging – we'll use this a lot later!
You'll notice that a new sketch automatically comes with two special C++
functions: setup() and loop(). These are fundamental
to every Arduino program:
-
void setup(): This function runs once when your Arduino board powers on or resets. You put code here that you only want to execute at the very beginning (like setting up pin modes, starting communication). -
void loop(): This function runs continuously, over and over again, forever, aftersetup()is finished. This is where your robot's main behavior and actions will live.
Learning Tip: "Think of setup() as your robot's
morning routine (getting dressed, checking systems) and loop() as
its daily life (moving, sensing, reacting)."
Step 3: Your First C++ Robot Program: "Blink"
Now for the fun part! Let's write our very first Arduino C++ sketch to make the built-in LED on your Arduino board blink.
What you'll need:
- An Arduino board (e.g., Arduino Uno, Nano, Mega).
- A USB cable to connect your Arduino to your computer.
<!-- end list -->
-
Connect Your Arduino: Plug your Arduino board into your computer using the USB cable. The power LED on the board should light up.
-
Select Your Board: In the Arduino IDE, go to
Tools > Boardand select the type of Arduino board you have (e.g., "Arduino Uno"). -
Select Your Port: Go to
Tools > Portand select the serial port that your Arduino is connected to. It might be labeled with "Arduino" or similar (e.g.,COM3on Windows,/dev/ttyUSB0or/dev/tty.usbmodemXXXXon Linux/macOS). If you're unsure, disconnect your Arduino, check the list, then reconnect and see which new port appears.-
Visual Aid: Screenshots of
Tools > BoardandTools > Portmenus.
-
Visual Aid: Screenshots of
-
Enter the Code: Copy and paste the following C++ code into your Arduino IDE sketch editor, replacing any existing text:
// My First Robot Blink! - A C++ Robotics Journey Begins // This sketch makes the built-in LED on your Arduino board blink on and off. void setup() { // The setup() function runs once when you press reset or power the board. // We use it to initialize pins or start communication. // pinMode() is a C++ function provided by Arduino. // It configures a specific pin to behave as an input or an output. // LED_BUILTIN is a handy constant that refers to the on-board LED pin. pinMode(LED_BUILTIN, OUTPUT); // Configure the built-in LED pin as an OUTPUT } void loop() { // The loop() function runs over and over again forever, after setup() completes. // This is where your main robot behaviors and actions will go. // digitalWrite() is another C++ function. // It writes a HIGH (5V) or LOW (0V) value to a digital pin. digitalWrite(LED_BUILTIN, HIGH); // Turn the LED ON (by setting voltage HIGH) // delay() is a C++ function that pauses your program for a specified time in milliseconds. delay(1000); // Wait for 1000 milliseconds (which is 1 second) digitalWrite(LED_BUILTIN, LOW); // Turn the LED OFF (by setting voltage LOW) delay(1000); // Wait for another 1 second } -
Verify and Upload:
-
Click the "Verify" button (checkmark icon) on the toolbar. This checks your C++ code for any syntax errors. If there are no errors, you'll see "Done compiling" in the output console.
-
Click the "Upload" button (right arrow icon). This compiles your code and then sends it to your Arduino board. You'll see "Done uploading" in the console.
-
Visual Aid: Screenshot of the Arduino IDE with the "Blink" code, highlighting the Verify and Upload buttons.
-
Witness Your First Robot Action!
After a successful upload, you should see the built-in LED on your Arduino board (usually near pin 13) start blinking on and off, with a one-second pause in between.
Congratulations! You've just written, compiled, and uploaded your very first C++ program to a piece of hardware. This is the fundamental cycle for all robotics projects.
Learning Tip: "Every single line of C++ code you write in
setup() or loop() directly instructs your robot's
brain. The delay() function here is a great example of a simple
command that controls timing, which is crucial for robot movements!"
Next Steps
Now that you have your workbench set up and can make an LED blink, we're ready
to start making our robot think! In our next post, we'll dive into
C++ if/else statements and show you how to use them with an
Arduino button to make your robot make its first "decision."
Stay curious, and keep coding!

Comments
Post a Comment